Feeds:
Posts
Comments

First Published – 20 January 2010

It’s a hot hot summer’s day here in Melbourne, Australia, and in a fashion entirely inappropriate to the position of Under Gardener, I’m in my back yard drinking Pimm’s and Lemonade while harvesting Lavender.

Lavender is widely quoted as one of Queen Victoria’s and hence the Victorian era’s favorite scents.

“It is generally known that the Queen is a great believer in Lavender as a disinfectant, and that she is not at all singular in her faith in this plant… The royal residences are strongly impregnated with the refreshing odour of this old-fashioned flower, and there is no perfume that the Queen likes better than Lavender-water, which, together with the oil for disinfecting purposes, Her Majesty has direct from a lady who distills it herself.” Fragrant Flowers, 1895.

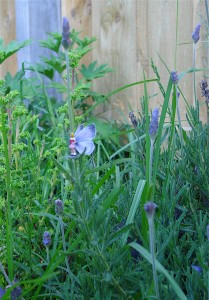
I love growing lavender.  It thrives in our Mediterranean climate and does very well in the free-draining sandy soil in my backyard.  To keep it flowering well I make sure it doesn’t get too dry on hot sunny days. I give each bush a light pruning after I have removed the flower spikes for drying. The pruning helps to keep the bush from getting leggy and in some years encourages a second flush of flowers. Bonus!

Lavender Ready to Harvest


Victorian Head Gardeners were responsible for harvesting the lavender spikes and tying them into paper cones for drying.  The drying, processing or distillation of the lavender then fell into the domain of the Housekeeper who managed the Still Room with her maids.

I dry my lavender in the same way by hanging the paper cones of flowers in a dry dark spot in my laundry.  It only takes a week to dry in warm weather.  Hanging the flower spikes upside-down also helps to keep the spikes straight which is useful if you are going to use them in dried flower arrangements.

The Victorian House Keeper would place bags of dried lavender flowers amongst stores of linen to perfume the cloth and help prevent attack by Clothes Moths.  My Mum’s Mum, my Nanna, told me that her mother Susan (a Victorian Country Woman ) keep a lavender bush by her clothes line on which she draped her favorite pocket handkerchiefs to dry and pick up the scent of lavender.

Dried lavender, Lavender Bag and Reckitts Blue Bag


I’ve often wondered how women in my family, during the Victorian Period, managed life in the newly settled State of Victoria in Australia.  It’s very easy to find information about the daily life of the ‘big English Victorian house’ but very difficult to find out about the lives of people such as my Great-Grandmother living in rural Australia.  What I know about her is from snatches of stories passed down from Nanna to me. The same is true for my father’s family who, by contrast, lived in an inner Melbourne working class suburb from the mid-Victorian era to the 1980′s.  Stories I do have about my Great-Grandmothers relate mostly to domestic chores and, surprisingly, to how they did their laundry!

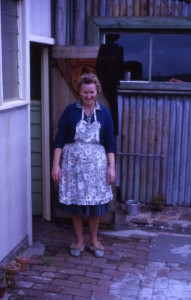
The house built by my paternal Great-Grandfather still had its original corrugated-iron lean-to laundry when I was a small girl.  I remember my Grandma boiling sheets in a copper cauldron and then helping her to wring them out through an old winding mangle.  It seems amazing to me now, as I stuff another load of clothes into the front loader, that basically Victorian laundry techniques were still in place in Melbourne in the early 1970′s!

Grandma standing by the Laundry in the mid-1960's


Mrs Beeton outlines the duties for a Laundry-Maid in paragraph 2372 of BOHM. There is another great description of Victorian laundry practice in the novel Lark Rise to Candleford written by Flora Thompson describing her life in late 19th century Oxfordshire.  She explains how the clothes were laundered every two weeks by a visiting Laundry Woman.  Flora explains that washing the clothes this infrequently showed that a family had enough money to afford enough clothes to wait that long between washes (when I don’t get to the laundry this week – this is how I plan to sell it).  Neither of my Great-Grandmas were affluent enough to send laundry out or hire help in.  I can’t imagine what a thankless task it was to boil clothes clean in a hot Melbourne summer – blah!

I am really interested in the idea of ‘blueing’ that both Beeton and Thompson described.  This is the practice of putting a light temporary blue dye in the rinse water for white linen to make it appear whiter. Today washing powder contains sophisticated optical whitening chemicals so the use of blue or Fig blue as Beeton calls it is rare.  So does it work?

When discussing this with my Mum she found that she still had some of Nanna’s Reckitt’s Blue bags in the laundry and was happy to give me a couple to experiment with.  Here are the results.

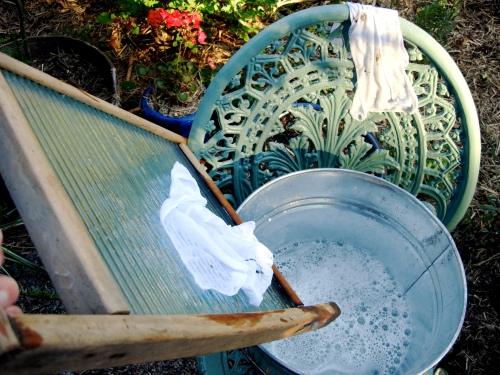
Using a Washboard to Wash Hankies - Very Tedious!

Dunking the 'Blue' tea-bag fashion in the rinse water.

Rinsed one in clean water and one in the blue rinse.

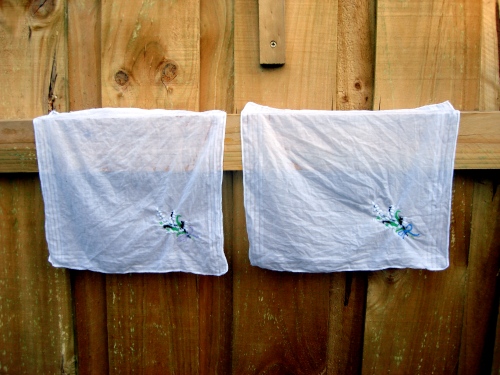
Hmmm - the one on the right was blued. Is it whiter?


I discovered that using a washboard is extremely tiresome. Washing an entire household’s laundry this way would give you the shoulders of an olympic swimmer. It did eventually get the dirt out.  I used an Australian washing detergent from the Victorian era that my Great-Grandmothers would have made from scratch using this recipe.  It is free of whitening agents and available ready made in Australia today.  I remember grating soap on a cheese grater for my Grandma when she was making a batch – it still smells like my childhood to me.

Then I dunked the bag of Blue into the rinse water until the water was a pale blue in colour.

It is difficult to see in the photos that I’ve taken but the Hanky dunked in the blue rinse looked blue at first rather than white.

Opinions in this household vary but I really couldn’t see a difference between the blued hanky and the other one.  It could be that the bluing works more effectively on older linen that tends to yellow as it ages.  I might try again if I find a piece of old fabric.

I guess this has strayed a long way out of the territory of the Under Gardener.

So bringing this discussion back to the garden.  My Grandmothers, as their Mothers did, loved the scent of lavender and kept bags of dried lavender with their hankerchiefs.  Grandma used lavender water to spray linen while ironing to help remove wrinkles and scent her sheets (ironing sheets seems unnecessary but I think this was one of her little luxuries). I like growing lavender as it is a plant that connects me to the women in my family and back to my Great-Grandma’s laundry rituals.

If you feel inspired to try Lavender Water here is a modern version of the Victorian Recipe for Lavender Water that I use at home.

Lavender Water

100ml (4 fl oz) Vodka

10 drops Lavender Oil

500ml (17 fl oz) Water

Add all ingredients to a Pint Spray Bottle and shake to mix.  It will keep indefinitely.  Spray it around the house to kill odours, on ironing for smoothing or keep some in the fridge to spray on you on hot days. It is also fairly good at killing the ‘wet dog smell’ on woollens that have got damp in winter.

Just be-careful not to use it as a cocktail mixer by mistake!


First Published – 3 January 2010

One of the tasks of the Victorian Head Gardener was to grow all the flowers ‘the big house’ would need throughout the year.  One of the reasons why I think these Gardeners were awesomely talented, given the Victorian love of all that is floral, is that this was a mammoth task.  Head Gardeners had to master the fairly tricky production of flowers, fruit and vegetables on a commercial scale and they had to provide staff to arrange all the flowers for the house on a daily basis or do it themselves.  To add an extra degree of difficulty to their work schedule they also provided the Master with daily floral buttonholes for his lapel and the Mistress with garlands for her dress and floral head-dresses as required.  Victorian Head Gardeners invented the art and profession of Floristry.

I’ve never really grown flowers for decoration, so this is a whole new area for me to explore and an appropriate task for an Under Gardener to be studying.  To celebrate the New Year I decided to start with something small. I had thought about decorating a table in Victorian fashion but I feel that that is something to work towards for the next Australian spring.  I plan to pace myself with the floristry.

For inspiration and instruction I watched the wonderful Harry Dodson of the BBC’s ‘The Victorian Flower Garden’.  Harry and Peter Thoday are going to be my principle guides through the year ahead as I try to master some of the more technical aspects of Victorian gardening.  If you watch the clip you will see that Harry explains how to make buttonholes in the last few minutes.

Here are my efforts:

Buttonholes ready to present to the Butler and Lady's Maid.


On the left, the buttonhole for him, is a Lemon Geranium Leaf, Sage Leaves, Lavender and Nasturtium flower.

On the right, for her, a Pineapple Sage leaf, Thai Basil flower spikes and a Native Hibiscus flower.  I think the cotton I used was too big, I tried sewing cotton but that was too fine to get a hold of, so for future projects I need to find the ‘Bass’ that Harry refers to or maybe ‘Rafia’ if is was around in the Victorian era.

My sister-in-law obviously has psychic abilities as she bought me a fabulous book, ‘The Head Gardeners – Forgotten Heroes of Horticulture’ by Toby Musgrave, for Christmas.  Musgrave explains that the Head Gardener and the Butler along with the Cook were on an equal footing in the pecking order of a household.  This could lead to difficulties over buttonholes as in some households the Butler would collect the flowers and make the arrangement and in others it was solely the Head Gardener’s responsibility.   Depending on personalities this could be fraught territory.

I’m not sure what the Victorians would make of these combinations.  It seems that any Head Gardener worth his salt would know his Masters preferences and would need to juggle preference with availability in the garden probably planning ahead for special occasions. Both of my buttonholes were very aromatic which I know the Victorian’s would have approved of.  The Victorians invented a ‘Language of Flowers‘ in which any arrangement of flowers would have a particular coded meaning.  Red roses for ‘love’ and rosemary for ‘remembrance’ are probably the only modern survivors of that custom.  I remember reading a beautiful Kate Greenaway book on the subject as a child.  I think working out what the arrangement needed to ‘say’ would have been outside the scope of the Head Gardener’s role – I imagine that if particular flowers were called for this would have been the realm of the Butler or Lady’s Maid to arrange and communicate.

Anyway we enjoyed wearing them for dinner and my husband thought he could get the hang of having one for special occasions.  I don’t think I or my garden could manage daily buttonholes but I like the idea of making them throughout the year.  I may even progress to making a full arrangement for a lady’s dress. Yikes!


Hi,

This year I will be concentrating on the following experiment.

I’m going to follow the instructions written for home gardeners in 1854 by Smith, Adamson and Co in their booklet The Colonial Gardener.  This booklet is thought to be one of the first home gardening books published in Victoria and outlines monthly instructions for the vegetable garden.  If you would like to have a look at it click here it is available online through the State Library of Victoria website.

This project will start in April 2012.

In the meantime I will be re-posting a project I was involved in during 2010 called The Queen’s Scullery.  In this project I tried to re-create a number of Victoria Era gardening practices.

I hope you enjoy.


We have just had the most glorious weekend in the garden, 24 degrees and sunny, just perfect. With all the rain this winter the garden looks like the national weed collection and two whole days of weeding has not made much of a dint.

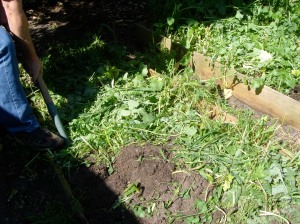
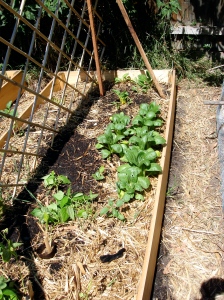
Digging in the Green Manure

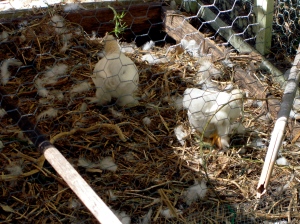
We dug in the green manure (mustard) into two garden beds. This is the first time we have dug the mustard into the garden in previous years we have let the chickens on the bed to eat it down. This year we cut leaves to feed to the chickens through the winter leaving the plants to keep growing. My chickens love mustard and the way they fold a mustard leaf into a cigar as they gobble it down is extraordinary. I’m looking forward to seeing if the mustard does imporve the soil.

I hoping that the green manure will increase the water holding capacity of the soil. I plan to grow climbing beans in this bed and they seem to be very thirsty plants so this should be a good test. Apart from yummy beans the Purple King Climbing Bean is a beautiful plant the hanging dark purple beans a very ornamental.

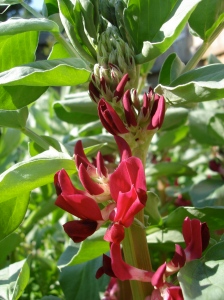
Glowing Scarlet Broadbean Flowers.

I planted Broadbean seeds in June and they are now, four months later, about a metre tall and in fall flower. I planted a Scarlet Broadbean as well as the standard ‘Prolific’.  The Scarlet plants are slightly shorter, maybe 80cm, a very fetching in the sunlight .

A second wild swarm of bees arrived in the garden on Sunday. This swarm is still sitting under the Jasmine on the back fence in a ball about the size of an Aussie rules football (Mmmm two football finals – two swarms. Coincidence or cosmic?). There is so much swarming at the moment that there isn’t a keeper available to come and collect it. I’m not at the stage were we can collect a swarm by myself.

I will be ready next year though. I’ve read that you can add a swarm to a hive by placing the swarm into a box on top of the hive. Newspaper is used to separate the two colonies. The bees then eat through the paper towards each other, by the time they meet, they recognise each other as the same colony due to the intermingling of pheromones. This seems to be a quick way to build a hive – well lets wait and see.

Next task is to germinate more seeds!

Feral Bees Fly By

Hive Box New Home for Swarm!

Interesting weekend in the backyard.  We had our first warm spring day on Saturday and the temperature shot up to 20 degrees Celsius – lovely!  All of a sudden the backyard was a swirling sea of bees.  The air was think with bees for about an hour and then the wild swarm settled in a large ball on the jasmine vine on our back fence. This is the second wild swarm that we have attracted to our backyard in the last two years.  The sound of a swarm of bees is flight is truly deafening, more like the roar of jet engines than a gentle hum – amazing!

I called a ‘Swarm Collection’ beekeeper from the Southside Beekeepers and she arrived very quickly to start collecting the bees.  Now I wish I had taken photos of this process but it was too exciting to even think about tearing my eyeballs away for a moment.  I even suited up myself to help (I held the cardboard box)!

Essentially the beekeeper used a large soft brush called a ‘Bee Brush’ to sweep the bees off the vine and into a large cardboard box.  Once the bees were in the box they were gently transfered to a hive box (see photo). We actually saw the Queen Bee slide into the hive and once she was installed any bees still in flight started to move towards the hive box.  The bees that had settled on the pale-pink-sheet we had laid on the ground under the swarm all turned around and formed neat cues to crawl up the sheet into the hive door – strangest thing I’ve ever seen.

By dusk on Sunday all the bees had settled in the hive.  The beekeeper then taped the box closed after giving the bees two hive frames of honey (food and water).  The bees were then on their way to a new permanent home with a backyard vegie grower only a few suburbs away from me.

I was surfing around You tube and found this fabulous program – Landshare.  The idea behind the English Landshare program is that people with land to spare donate space to people who want to grow their own vegetables.  The program seems to be thriving.

I take my hat off to the Landshare program so simple and such fabulous community building outcomes – genius.


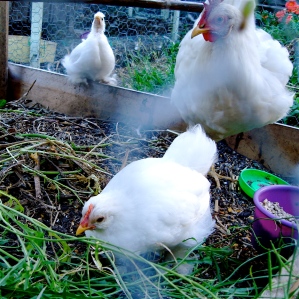
Nessa, Kenso and Demelza - a happy chicken family.


Chicken Update

Our new chicks are now fully feathered and 6 weeks old.  Mum Demelza is still actively mothering the chicks who are becoming increasingly bold and independent day by day.

The biggest problem we have had has been the need to separate Tabbitha from the flock.  Tabbitha is a Leghorn bantam and sister to Demelza. Instead of becoming broody she has become increasingly agressive towards the chicks. After a week of Tabbitha waking us up every morning with her attempts to crow we needed to do something. A crowing hen will soon have all the neighbours offside.  Last night we swapped the chickens around placing Demelza and chicks in the new run and Tabbitha back in her old run – hazaar she has stopped crowing!

It seems that Tabbitha is turning broody but wants to brood her eggs in the coop she is familiar with.  Demelza and the chicks seem happy anywhere so long as they are together.  The plan is now to leave them separated until the chicks are three months old by which time I hope Tabbitha has passed in and out again of broodiness and should be ready to share space again.  Here’s hoping!

Tomatoes

The Roma tomatoes continue to develop with blossom end rot.  Other tomatoes are fruiting but not in spectacular bounty.  There is still a second bed to come on – but at this stage it is looking like another poor harvest with no surplus for bottling – fail!

Eating the Produce

Tonight I am making Potato, Onion and Cheese Pancakes with Sour-cream and Chive dressing.  There are enough tomatoes ready to pick to make a Butter Crunch Lettuce, Tomato and Cucumber Salad.

Butter Crunch Lettuce has again performed really well in our sandy soil.  My cucumbers have not yet produced fruit so I have swapped a promise of honey for cucumbers with a college at work.

Garden tasks for February

We have had extremely strong winds today so tomorrow will be spent tying up plants that have fallen over in the wind and assessing the state of the garden.  We have had rain in the last week but the garden is looking very dry.  I think it is too late to sow any more seeds but I would like to try another sowing of Purple King Beans.

I intend to visit the Market tomorrow to see if there are any Vegetable seedlings worth planting now. Otherwise the next task for February is to work out in which order the Chicken Coop will rotate around the vegetable beds and planning the planting for the winter crop.


30 January 2010 - Harvest


We are enjoying a mild January in Melbourne, Australia.  Some rain and only a few days over 40 degrees.

This post is an update on progress in the vegetable garden. As usual there have been some spectacular failures and some minor successes.

This photo shows todays harvest:

One zucchini that hid long enough to become a marrow. I can’t account for it but the zucchini plants have hardly produced at all this year.  The plants look great and are flowering but not setting fruit?

Two Pumpkin Delicata.  For the first time ever this lovely little pumpkin plant has produced fruit.  It seems to like the spot in which it was grown this year in a bed that has sun in the morning but shade in the heat of the day.

PakchoiPakchoi is doing really well this year and is now ready to harvest.  The one that I picked today was full of white cabbage moth eggs so there will be a race between us and the grubs to eat them first.  Tomorrow is forecast to be a hot day if the predicted cool change hits in the afternoon I will spray the inside of the pakchoi with molasses diluted in water. Don’t know why but grubs hate this and it is an effective control so long as you remember to reapply after rain.

The bean trellis in this photo should be covered in Ceylon Spinach by now. Not a one has turned up.  Next year I will start the seeds in jiffy pots and plant them out as seedlings.

Tomatoes have put in a patchy performance this summer.  Cherry Bite, Beef Steak and Green Zebra have all fruited very well. Roma tomatoes planted in the same bed as the others have all come down with Blossom End Rot.  Blossom End Rot is usually caused by uneven watering or a lack of calcium.  I’ve added extra Blood and Bone to this bed so I’m hoping that subsequent Romas will be OK.  Very puzzling!


Nessa and Kenso


Our two little Buffy Pekin chicks are growing very quickly.  They are now five weeks old and covered in white feathers apart from their baby yellow fluffy heads.

They are now eating half crumble and half growing crumb as well as pecking over scraps with their mum. Melon skins and fruit is a early favorite.

Unfortunately we are not able to keep roosters in suburban Melbourne so when Kenso is three months old he will need to return to the farm (very sad he is such a feisty little chap).

Most of February will focus on keeping the garden watered and planning winter crops.  

Waiting for February heat.


Mr Cornwall went out to the chickens yesterday to collected our daily egg and discovered that the chicks had already hatched.

Surprise!

All has gone very well – until this morning.

I was watering the garden in preparation for another scorcher when I heard alarmed chick peeps coming from the run.  Bad Aunty Chicken was standing on one chick in the middle of the run pecking at it – hence the peeps.

Needless to say we have separated Bad Aunty into her own temporary run.

Mum Chicken and both Chicks seem OK so far.

Happy New Year!

Can you see the Earwig hiding in the hole?

While watering the Garden  this morning I found another beautiful tomato with a big black hole.  Nestled inside was an Earwig and a pile of Earwig Babies.  Could it be that these rotten spots are caused by Earwig nom-age?

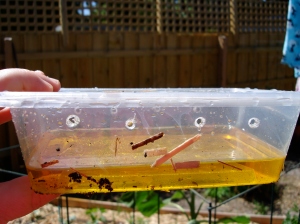
So in case it is – I’ve placed an Earwig trap under the tomatoes.  They are made from ‘Take-away’ plastic containers.  Make a few holes along the side with a pair of scissors then fill with vegetable oil.  Place the lid on the container and bury in the soil up to the depth of the holes.

Earwig Trap

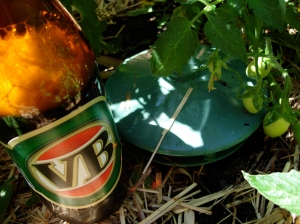
I also topped up the ‘Slug Hotels’ with fresh beer – as they are also very handy at catching and killing Earwigs.

Beer traps - container below soil level holds beer - lid keeps rain out.

Will check traps tomorrow and see if I have caught many.